Self-applied artificial nail enhancements are a method for extending or modifying the appearance of natural nails. This process typically involves adhering artificial materials, such as acrylic or gel, to the natural nail plate, often requiring careful application techniques and specific materials. The resulting extended nail provides a longer, fuller, or more polished look.
Home-based application of these enhancements offers potential cost savings compared to salon services. Moreover, it allows for customization of nail designs and styles. However, success hinges on meticulous adherence to manufacturer's instructions, practice, and patience. Improper application can lead to uneven results, damage to natural nails, and potential health risks. Safety precautions and proper hygiene are paramount during the process.
This understanding of at-home nail enhancement procedures is foundational for exploring the specifics of techniques, materials, and associated care requirements. The subsequent sections will delve into various application methods, appropriate tools, and considerations for achieving successful and safe outcomes.
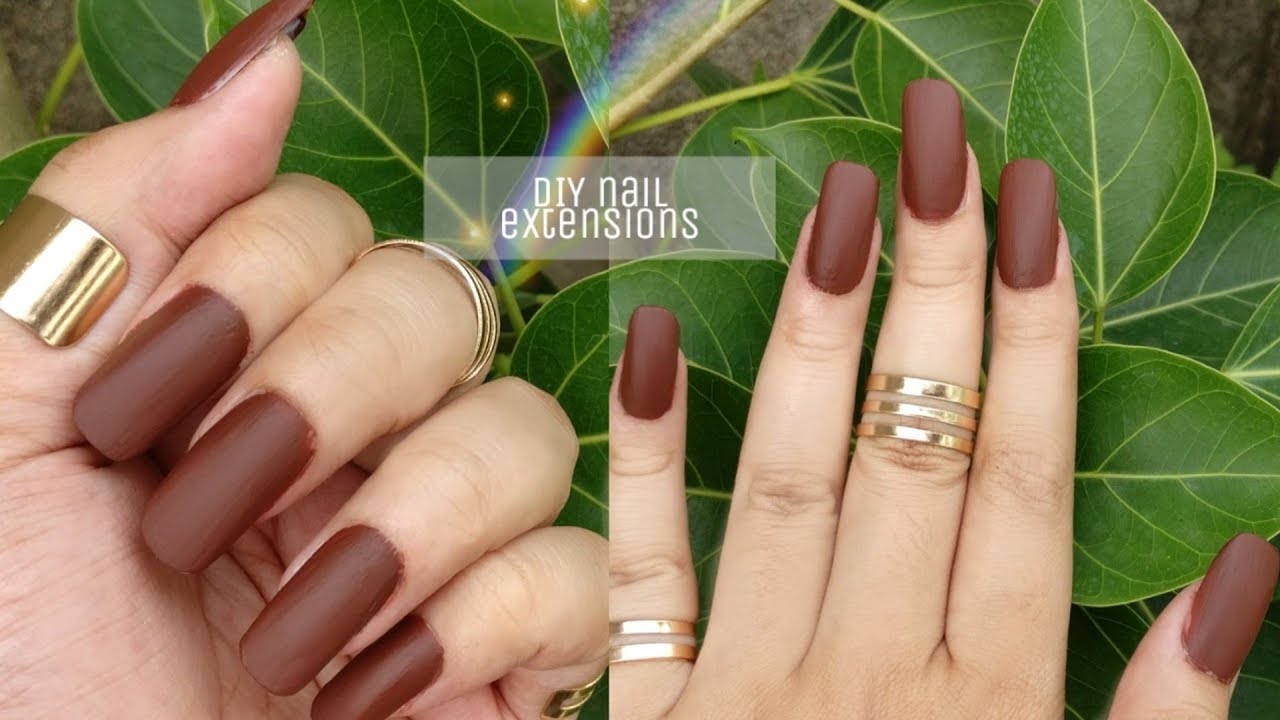
DIY Nail Extension
Home-based nail extension presents a multifaceted practice demanding careful consideration of crucial elements. Success hinges on understanding and applying these essential components.
- Materials
- Techniques
- Tools
- Safety
- Preparation
- Maintenance
- Hygiene
The success of DIY nail extension hinges on the meticulous selection and application of materials. Proper techniques are vital for achieving desired results, requiring careful study and practice. Necessary tools ensure precise application. Safety precautions prevent damage to natural nails. Nail preparation ensures optimal adhesion. Regular maintenance, including proper removal and nail care, is critical. Strict adherence to hygiene standards throughout the process safeguards health. For instance, using high-quality materials and mastering appropriate application methods contribute significantly to longevity and aesthetics, while rigorous sanitation reduces the risk of infection. A comprehensive understanding of these aspects fosters successful and safe outcomes.
1. Materials
Appropriate materials are fundamental to successful DIY nail extensions. The choice of materials directly impacts the longevity, aesthetic appeal, and safety of the procedure. Inadequate materials can lead to poor adhesion, premature breakage, damage to natural nails, or even infection. For example, using low-quality acrylic powder can result in a brittle extension that chips easily, while poor-quality adhesive may fail to properly bond, causing the extension to detach quickly. Conversely, high-quality, professional-grade materials offer superior adhesion, flexibility, and durability. This translates into a longer-lasting, more aesthetically pleasing result. Choosing the correct monomer-to-powder ratio in acrylic applications is crucial, as variations can impact the final product's structural integrity.
Beyond the materials themselves, understanding the specific needs of various nail extension techniques is essential. Gel extensions, for instance, require different curing times and UV/LED light types than acrylic. Different types of adhesives cater to specific nail conditions and extension styles. A thorough understanding of these relationships enables practitioners to select materials compatible with the chosen technique and client preferences. Proper material handling is also critical. Contaminated or improperly stored materials can compromise the quality of the extension and potentially increase the risk of infection. Therefore, careful handling and storage procedures are important.
In conclusion, the selection and application of suitable materials are critical for successful DIY nail extensions. Carefully choosing appropriate materials, considering the method, and maintaining correct hygiene practices are essential to minimizing risks and achieving desired outcomes. A deeper understanding of these material choices is paramount for ensuring safety, aesthetics, and the overall success of the at-home nail enhancement process.
2. Techniques
Techniques employed in DIY nail extensions are paramount. Effective application methods directly influence the longevity, aesthetic appeal, and overall success of the project. Inaccurate or inadequate techniques can result in structural weakness, uneven surfaces, premature breakage, and compromised nail health. For example, improper application of acrylic powder may lead to a rough, uneven finish, while inadequate curing of gel extensions can result in a weak, brittle nail. Consequently, mastery of proper application techniques becomes vital for achieving satisfactory and durable results.
Diverse techniques exist, each demanding specific tools and procedures. Acrylic application, for instance, requires precise mixing of monomer and powder, careful shaping, and thorough curing. Gel extensions necessitate proper application and curing under UV or LED light. Different techniques cater to specific nail shapes, desired lengths, and personal preferences. Understanding and mastering various techniques empowers individuals to adapt to different needs and styles. Furthermore, the practical application of these techniques contributes to client satisfaction and the achievement of professional-looking results within a home environment. Detailed videos and instructional guides can facilitate hands-on learning and refinement of these techniques.
In conclusion, techniques are integral components of DIY nail extensions. Effective application, adherence to specific instructions, and meticulous practice are essential for achieving both successful and aesthetically pleasing outcomes. A solid foundation in appropriate techniques allows for customization and adaptation, thereby enabling practitioners to achieve desired results in a safe and effective manner. This comprehensive understanding of diverse techniques ultimately maximizes the potential of DIY nail extensions while promoting client satisfaction and safety.
3. Tools
Appropriate tools are critical for successful DIY nail extensions. The selection and quality of tools directly impact the process's efficacy and safety. Poor-quality tools can lead to inconsistent application, uneven results, and potential damage to natural nails. Precise application depends on the right tools, which is particularly important for shaping, filing, and adhering artificial materials. For instance, an inadequate nail file can cause uneven nail surfaces, compromising the extension's integrity and longevity.
The range of necessary tools varies with the specific extension technique. Acrylic extensions often require specialized files, brushes, and mixing bowls, whereas gel extensions demand different UV/LED curing lamps and precise application tools. A meticulous selection of appropriate tools is paramount to achieving desired results. Precise and effective tools ensure proper shaping, application of bonding agents, and avoidance of unnecessary stress on natural nails. Furthermore, consistent use of sterilized tools reduces the risk of infection. An example of a vital tool for gel extension is a high-quality UV lamp, enabling proper curing and preventing the gel from becoming brittle. The quality and precision of these tools directly translate into the quality and longevity of the completed extension.
In summary, the correct selection and utilization of tools are essential for successful DIY nail extensions. Appropriate tools minimize risks, enhance accuracy, and facilitate a more satisfying and safe process. Investing in high-quality instruments contributes to the longevity and aesthetic appeal of the finished nail extension, ultimately benefiting both the practitioner and the overall outcome. A thorough understanding of tool selection and proper use is vital for achieving professional-level results in a home setting.
4. Safety
Safety is paramount in DIY nail extensions. Inadequate precautions can lead to significant risks to natural nails and overall health. Understanding and implementing safe practices minimizes potential complications and ensures a positive experience.
- Material Safety
Proper handling of materials is crucial. Concentrated solvents and certain chemicals used in acrylic or gel application can cause skin irritation, allergic reactions, or respiratory problems. Adherence to manufacturer instructions, appropriate ventilation, and the use of protective gear (gloves, masks) are critical. Examples include avoiding skin contact with monomer solutions or using diluted forms when necessary. Improper handling can lead to significant health risks and should be avoided.
- Hygiene Practices
Maintaining hygiene throughout the process is essential to prevent infection. Using clean tools, ensuring proper sterilization of instruments, and maintaining a sanitary work area are paramount. Examples include regularly disinfecting tools and surfaces, washing hands thoroughly before and after each step, and avoiding contact with the eyes, nose, and mouth during the procedures. Failure to adhere to these hygiene practices can introduce pathogens, potentially resulting in infections or other health complications.
- Nail Preparation & Application Techniques
Proper nail preparation and application techniques minimize damage to natural nails. Excessive filing, inappropriate adhesive usage, or forceful application can lead to breakage, weakening, or detachment of the natural nail bed. Examples include avoiding unnecessary filing of natural nails, using appropriate adhesives to prevent damage to the nail matrix and careful application of artificial materials. Improper techniques can lead to long-term nail damage, requiring extensive recovery time or further treatment.
- Equipment Safety
Use of appropriate equipment, particularly UV or LED lamps for gel application, is crucial. Incorrect use or exposure to UV light can lead to skin damage or eye irritation. Maintaining a safe distance from the curing lamp, using proper safety goggles, and adhering to the recommended exposure times minimizes risks. Examples include verifying the lamp's safety certifications, following manufacturer instructions precisely, and avoiding prolonged exposure of skin to the lamp's radiation.
These safety considerations are interwoven with the entire process of DIY nail extensions. Implementing these precautions, combined with proper technique and understanding, creates a safer and more successful experience. Avoiding potential hazards through informed practice and adhering to the aforementioned precautions minimizes risks and facilitates long-term nail health and well-being.
5. Preparation
Thorough preparation is fundamental to successful DIY nail extensions. It lays the groundwork for a positive outcome, minimizing risks and maximizing the longevity of the finished product. Ignoring preparation compromises the integrity of the natural nail and the adherence of artificial materials, potentially leading to premature damage and complications.
- Nail Health Assessment
Evaluating the condition of natural nails is crucial. Existing damage, such as cracks, weak spots, or infections, necessitates addressing before any extension application. Recognizing and addressing these issues safeguards the integrity of natural nails during the extension process and subsequent maintenance. Proper nail health, prior to the application of artificial enhancements, directly impacts the final product's structural integrity and durability. Failing to address preexisting issues introduces risks that can complicate the entire extension procedure.
- Nail Preparation Procedures
Proper preparation procedures are critical. Techniques like meticulous cleaning and pushing back cuticles create a smooth, clean surface for optimal adhesion. This step removes oils and debris, which can hinder the bonding process. Careful filing to the desired shape and length is also a vital aspect of preparation. This ensures a stable base and an aesthetically pleasing outcome. Ignoring these foundational steps directly impacts the success and longevity of the artificial extension.
- Material Selection and Review
Carefully reviewing and selecting appropriate materials according to the intended nail extension style is essential. Considering the type of artificial enhancement (e.g., acrylic, gel), specific adhesives, and associated tools is crucial. Matching materials to the needs of the nail extension style enhances adherence and minimizes risks of premature failure. Understanding the characteristics of each component, and how they work in combination, directly relates to achieving lasting results. Incorrect selection may lead to poor bonding or damage to natural nails.
- Safety Precautions and Environment Setup
Establishing a safe and well-ventilated workspace is crucial. Adequate lighting and ventilation are important for proper application. Using personal protective equipment (PPE), including gloves and masks, is critical when working with chemicals. This protects against potential health risks associated with materials used in nail extension. Creating a structured and clean workspace is essential, ensuring the safety of the practitioner and the successful execution of the procedure.
Effective preparation significantly contributes to the success of DIY nail extensions. By ensuring nail health, practicing correct procedures, selecting suitable materials, and establishing a safe workspace, practitioners can minimize risks, maximize the longevity of the extension, and achieve desired results. A comprehensive approach to preparation enhances the overall experience and safeguards the well-being of the practitioner and the integrity of the natural nail.
6. Maintenance
Post-application maintenance significantly impacts the longevity and success of DIY nail extensions. Neglecting maintenance compromises the integrity of the extension and potentially damages natural nails. Proper maintenance involves regular care routines, addressing potential issues promptly, and understanding the specific needs of the chosen extension material. For example, neglecting to properly hydrate or moisturize the natural nail underneath the extension can lead to dryness and brittleness, increasing the risk of chipping or breakage. Similarly, inadequate cleaning can trap contaminants beneath the extension, potentially leading to infections or discomfort.
The importance of maintenance extends beyond preventing damage. Regular checks allow practitioners to identify and address minor issues before they escalate. Early intervention can save the extension, preventing more significant damage and potentially costly repairs or replacements. For instance, noticing a small crack early allows for immediate reinforcement, preventing a large section of the extension from detaching. Consistent maintenance enables practitioners to preserve the aesthetic appeal of the extension and maintain the health of natural nails. This ensures extended wear and prevents the premature need for reapplication.
In conclusion, diligent maintenance is an indispensable component of successful DIY nail extensions. By acknowledging the crucial link between upkeep and longevity, practitioners can significantly enhance the overall success rate and positive outcome of their efforts. Understanding the specific care requirements of chosen materials ensures the durability and aesthetic appeal of the finished product, fostering client satisfaction and minimizing potential complications. Regular maintenance ultimately transforms the procedure from a temporary enhancement into a sustainable practice, safeguarding natural nails while promoting the desired results.
7. Hygiene
Maintaining meticulous hygiene is inextricably linked to the success and safety of DIY nail extensions. Inadequate hygiene practices can introduce pathogens, compromising the health of both the natural nail and the individual undertaking the procedure. Improper sanitation during the application process can lead to infections, inflammation, and discomfort. The consequences of neglecting hygiene standards can extend beyond immediate discomfort, potentially causing long-term damage to the nail bed and surrounding tissues.
A crucial aspect of hygiene involves the meticulous cleaning and sterilization of tools. Contaminated tools can harbor bacteria and fungi, directly transferring these pathogens to the natural nail during the extension process. This risk is heightened if proper disinfection protocols are not followed. Examples include failing to disinfect nail files, brushes, and mixing bowls after each use, introducing bacteria and pathogens that can cause infection. Proper use of disinfecting solutions and adherence to recommended sterilization times are crucial to minimize this risk. Consistent cleaning also prevents the buildup of debris and contaminants, which can further increase the risk of infection or irritation. A clean and organized workspace significantly reduces this risk.
Furthermore, meticulous hand hygiene plays a critical role. Practitioners must thoroughly wash and sanitize hands before and after each step of the procedure. This practice minimizes the risk of transferring microorganisms from the hands to the nail and the surrounding skin. Failing to maintain this rigorous hygiene can lead to the transmission of bacteria or fungi that may thrive in the moist environment often created during nail extension application. This results in skin irritation, discomfort, or even more serious infections. Consistent hand hygiene, along with meticulous cleaning of all tools, is paramount for creating a sterile environment to maintain overall health and safety.
In conclusion, the link between hygiene and DIY nail extensions is fundamental to successful and safe outcomes. Prioritizing hygiene throughout the entire processfrom tool sterilization and handwashing to maintaining a clean workspacedirectly impacts the practitioner's health and the longevity of the extension. By understanding and practicing stringent hygiene standards, practitioners can significantly minimize potential health risks, promote healthy nails, and enhance the overall well-being of those undergoing the procedure.
Frequently Asked Questions about DIY Nail Extensions
This section addresses common queries and concerns regarding at-home nail extensions. Accurate information and practical guidance are provided to aid individuals in making informed decisions.
Question 1: What are the essential materials required for DIY nail extensions?
Answer 1: The necessary materials vary depending on the chosen technique (e.g., acrylic or gel). Essential items often include artificial nail enhancement powders or gels, liquid monomers or monomers, adhesives, UV/LED lamps (for gel), files, buffers, brushes, and nail art tools. Quality materials are recommended for optimal results and longevity.
Question 2: What precautions should be taken to ensure nail health during the application process?
Answer 2: Thorough nail preparation is critical. Natural nails should be evaluated for existing damage, and any issues addressed before application. Proper filing techniques and meticulous adherence to manufacturer's instructions for chosen materials are essential to avoid jeopardizing natural nail health. Maintaining proper hygiene (clean tools, clean workspace) is vital in preventing infections.
Question 3: How can I determine the suitability of a specific DIY nail extension technique for my needs?
Answer 3: Research different techniques and materials thoroughly. Consider factors such as personal preferences, skill level, desired aesthetic, and the condition of existing nails. Online tutorials, instructional videos, and reviews from other practitioners can provide valuable insights. Realistic expectations about skill acquisition and time commitment are crucial.
Question 4: What steps should be taken to maintain the integrity of DIY nail extensions?
Answer 4: Regular maintenance is key. This includes appropriate nail care, careful handling to prevent chipping or breakage, and using appropriate products to maintain moisture balance and protect the natural nail underneath. Regular assessment of the condition of the extension and prompt action to address any damage are crucial.
Question 5: Are there potential risks associated with DIY nail extensions?
Answer 5: Potential risks include damage to natural nails (e.g., breakage, infection), allergic reactions to materials, and improper application techniques. Adhering to safety guidelines, using high-quality materials, and practicing proper hygiene significantly minimize these risks. Consult with a professional if experiencing discomfort or adverse reactions.
Question 6: How long does the DIY nail extension process typically take?
Answer 6: Application time depends on experience, complexity of the design, and chosen technique. Acrylic extensions often take longer than gel applications, and more intricate designs will increase the total time required. Realistic time estimations and preparation for potential delays are beneficial.
Understanding these frequently asked questions provides a solid foundation for individuals considering DIY nail extensions. Carefully considering each aspectmaterials, techniques, safety, and maintenanceis essential to ensure a successful and safe outcome.
The following sections will delve into specific techniques and material considerations for achieving desired results.
Tips for DIY Nail Extensions
Effective DIY nail extensions require careful planning, precise execution, and a commitment to meticulous technique. Following these tips ensures optimal results and minimizes potential risks.
Tip 1: Thorough Nail Preparation is Crucial. Prior to application, ensure natural nails are clean, free of oils, and properly shaped. Proper cuticle care and removal of any debris are essential for optimal adhesion and long-term health of the nail. Weak or damaged nails may be more prone to breakage.
Tip 2: Choose High-Quality Materials. The quality of materials significantly impacts the longevity and appearance of extensions. Using inferior-quality products can compromise the strength and adherence of the extensions, resulting in premature breakage or damage to natural nails. Select reputable brands and materials designed for professional-grade nail enhancements.
Tip 3: Master Appropriate Application Techniques. Understanding and practicing proper application methods for chosen materials (e.g., acrylic, gel) are essential. Thorough research and practice on a small scale (using practice nails) are recommended to achieve smooth transitions, even surfaces, and consistent application. Watching instructional videos or seeking guidance from experienced practitioners is valuable.
Tip 4: Maintain a Sterile Environment. Sanitation is crucial to prevent infections. Ensure all tools, implements, and work surfaces are thoroughly cleaned and disinfected before each use. Using appropriate disinfectants, and adhering to recommended sterilization procedures, are essential to protect natural nails from bacteria or fungi.
Tip 5: Employ Safe Filing and Shaping Techniques. Proper filing and shaping methods prevent damage to natural nails. Avoid using excessive force, utilizing appropriate tools (files, buffers) designed for the chosen material, and applying consistent pressure. This minimizes the likelihood of breakage or uneven surfaces.
Tip 6: Implement a Consistent Maintenance Routine. Regular maintenance is vital to extend the life of extensions. Follow manufacturer recommendations for cleaning, moisturizing, and protecting the extensions. Addressing any concerns early on is crucial in avoiding further damage or the premature need for reapplication.
Following these tips ensures that DIY nail extensions are both effective and safe, leading to longer-lasting, aesthetically pleasing results. A comprehensive understanding of materials, techniques, and safety measures minimizes potential complications and maximizes the positive outcome of the endeavor.
By implementing these strategies, individuals can transform the at-home application of nail extensions into a fulfilling and safe experience. Furthermore, consistent practice and a commitment to meticulous technique contribute to achieving consistently impressive results.
Conclusion
This exploration of DIY nail extensions underscores the multifaceted nature of the practice. Successful outcomes hinge on a comprehensive understanding of various elements. Material selection, appropriate techniques, proper tool utilization, rigorous safety protocols, meticulous preparation, consistent maintenance, and stringent hygiene practices are all interconnected components contributing to a positive experience. The process necessitates understanding the specific needs of diverse techniques and materials, and acknowledging that varied approaches may require adaptation and adjustments in skill and practice. Maintaining optimal nail health alongside the aesthetic enhancement is a significant consideration.
DIY nail extensions represent a potentially rewarding pursuit, offering personalized expression and potential cost savings. However, a conscientious approach emphasizing safety, meticulous technique, and ongoing learning is paramount. This necessitates a dedication to thorough research, adherence to manufacturer guidelines, and the pursuit of ongoing skill development. Ultimately, prioritizing safety and adhering to proper procedures are essential for both personal well-being and the success of the overall endeavor. Success and longevity of DIY nail extensions, therefore, depend entirely on conscientious effort and a careful and thorough approach.
Article Recommendations